Setup of the 'Thing' | AWS IoT - Part 2

In Part1 we setup the Arduino IDE, created a sketch and uploaded it to an ESP32, skipping past the part where the AWS side was configured. Therefore, in part 2 we will do just that, setup a “thing” (device) in AWS IoT core.
Creating a “Thing”:
An IoT “thing” is a representation and record of your physical device in the cloud. A physical device needs a thing record in order to work with AWS IoT.
Before our “thing” can connect to AWS IoT, we need an active device certificate with an appropriate policy attached.
- AWS IoT –> Manage –> Things –> Create things –> Create single thing
- Give the thing a name (leave the rest as the default)
- Select “Skip creating a certificate at this time” as we will being using the certificate we create later

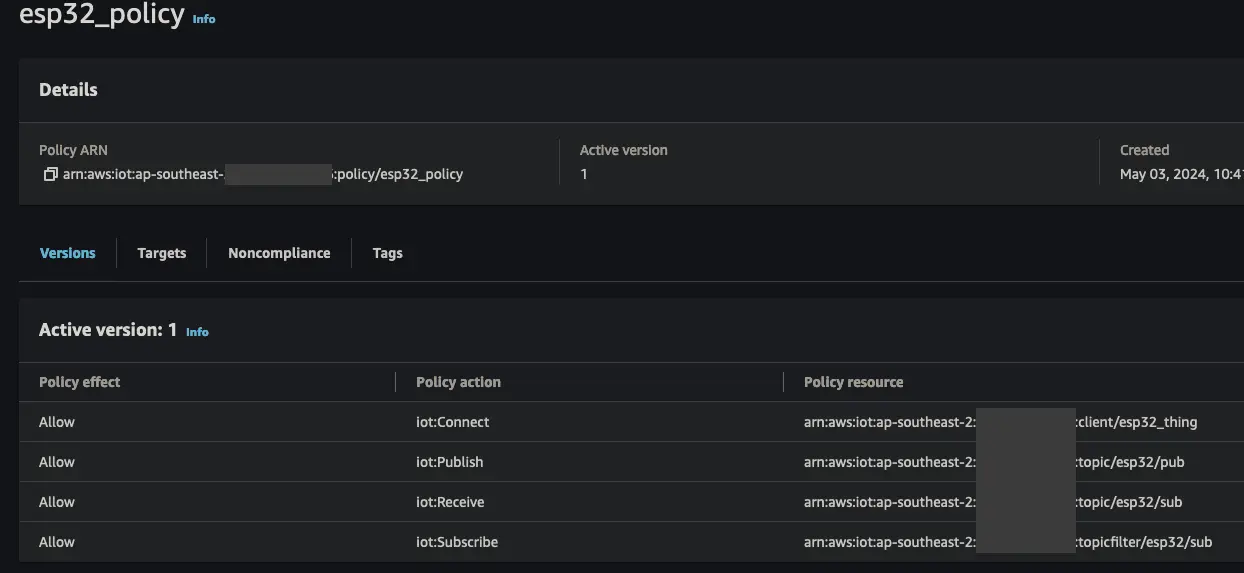
Policy:
The policy is how to control what the device can access in the AWS IoT data plane operations. For our purpose, we need to allow the device to connect to AWS IoT with iot:Connect as well as being able to publish/subscribe to our MQTT topics esp32/pub | esp32/sub with iot:Publish | iot:Receive | iot:Subscribe.
- AWS IoT –> Security –> Policies –> Create policy
- Give the policy a name
- Add the following json to the policy document, making sure to substitute with the appropriate info for your setup
1
2
3
4
5
6
7
8
9
10
11
12
13
14
15
16
17
18
19
20
21
22
23
24
25
{
  "Statement": [
{
  "Action": "iot:Connect",
  "Effect": "Allow",
  "Resource": "arn:aws:iot:ap-southeast-2:<account_id>:client/esp32_thing"
},
{
  "Action": "iot:Publish",
  "Effect": "Allow",
  "Resource": "arn:aws:iot:ap-southeast-2:<account_id>:topic/esp32/pub"
},
{
  "Action": "iot:Receive",
  "Effect": "Allow",
  "Resource": "arn:aws:iot:ap-southeast-2:<account_id>:topic/esp32/sub"
},
{
  "Action": "iot:Subscribe",
  "Effect": "Allow",
  "Resource": "arn:aws:iot:ap-southeast-2:<account_id>:topicfilter/esp32/sub"
}
  ],
  "Version": "2012-10-17"
}
- Click Create
Certificates:
Now that we have a policy, we need to create a certificate to attach to that policy.
Certificates are used as the authentication mechanism with AWS IoT. There are two options for creating a certificate for your device: Auto-generated using AWS IoT certificate authority (CA) or by uploading a certificate signing request (CSR) based on a private key you own.
- AWS IoT –> Security –> Certificates –> Add certificate –> Create certificate
- Select Auto-generated or the CSR option. I will be using the auto-generated certificate option (easy mode).
- Set the status to
Active, assuming you plan on using the certificate start away - Click Create
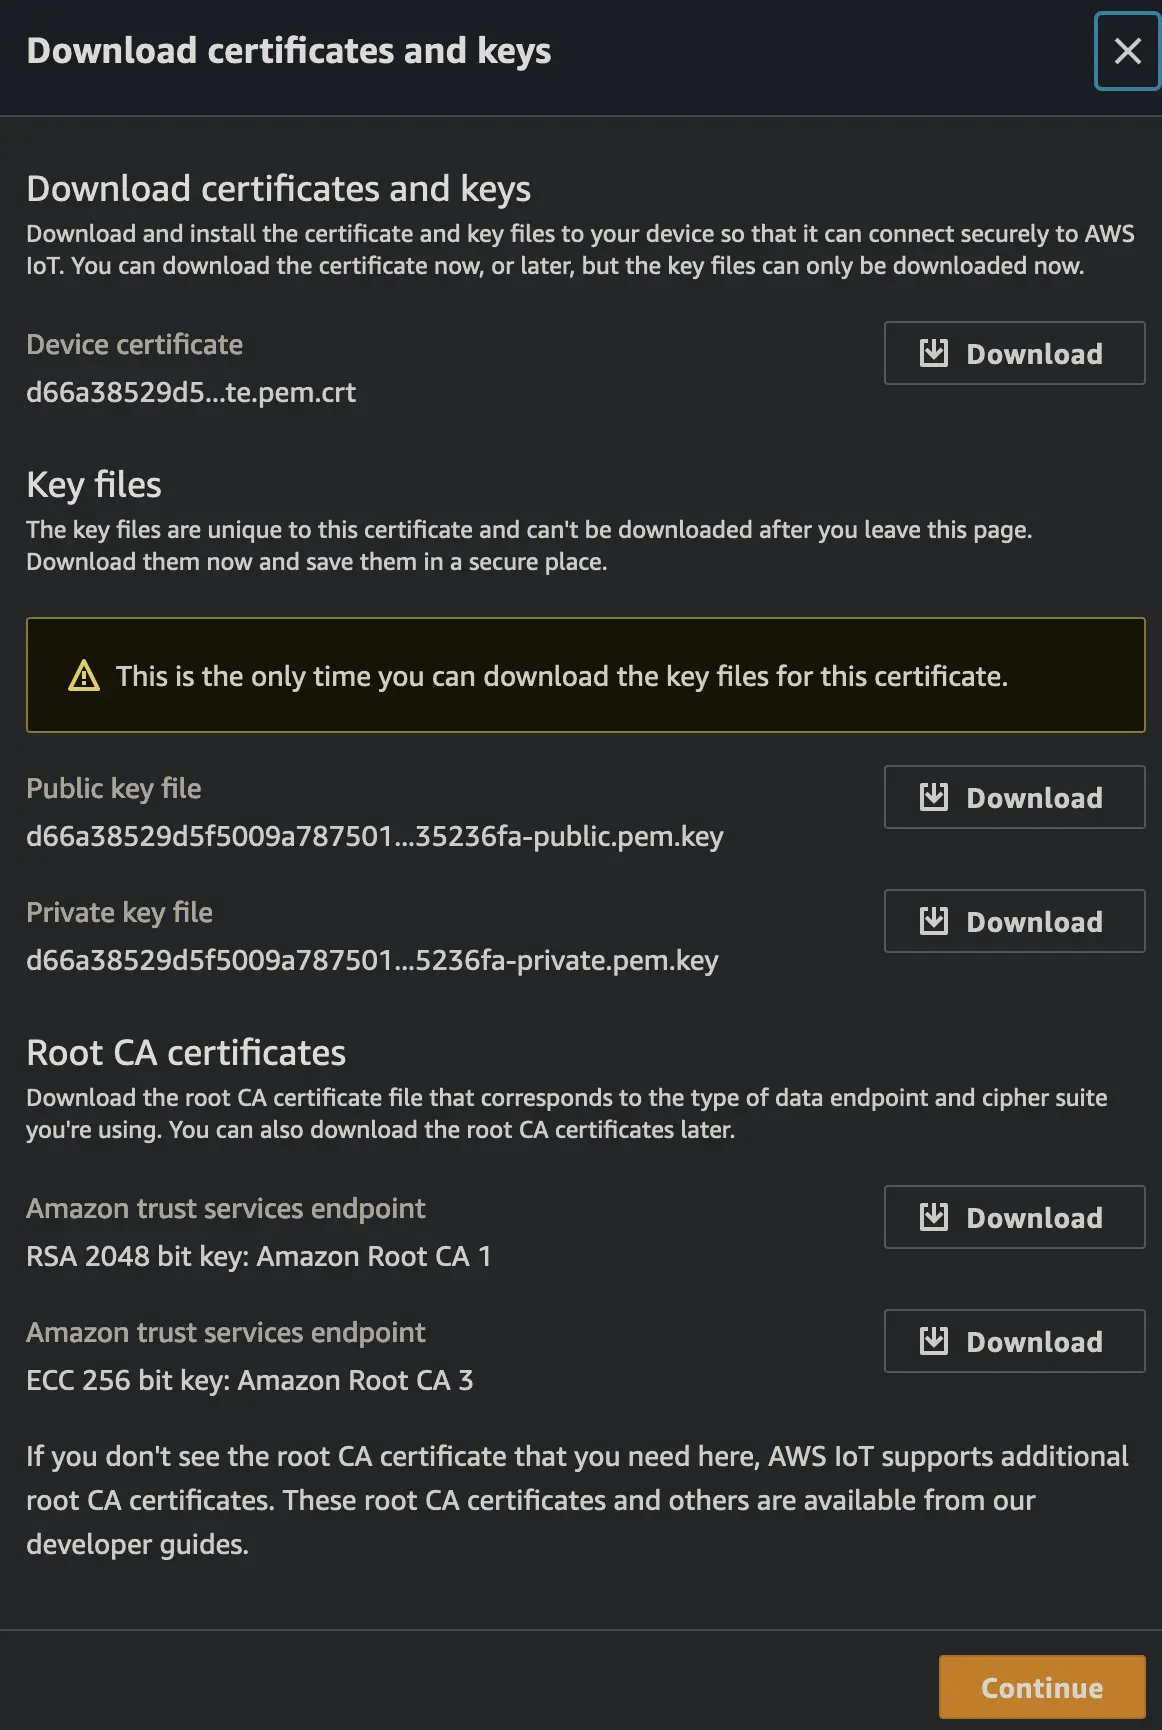
- Download the
Device Certificate,Private key fileand aRoot CA Certificate.
Important: This is the only time you can download the key files for this certificate, so make sure you have them before moving on. Store the keys in a safe place
Now we have a certificate lets attach it our policy and thing we created earlier
- Select the tickbox next to your newly create certificate and select Actions –>
Attach policy - In the Policies drop down list select a policy
esp32_policyand attach the policy - Repeat step 1 but select
Attach to thingsthis time - In the Things drop down list select a thing
esp32_thingand attach the thing
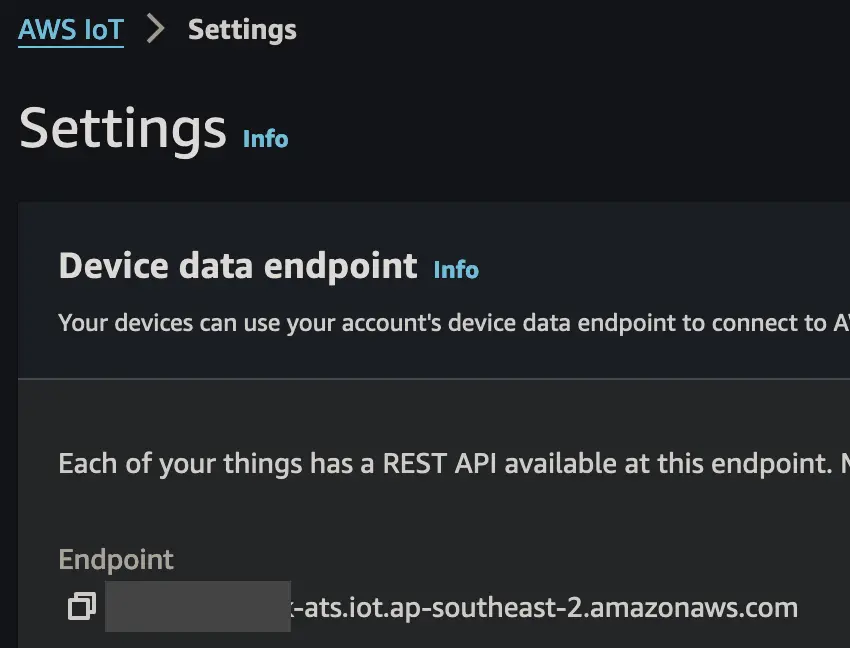
Endpoint:
The last piece of information we need is the AWS ATS IoT Endpoint for our AWS account.
- Settings –> Device data endpoint –> Endpoint
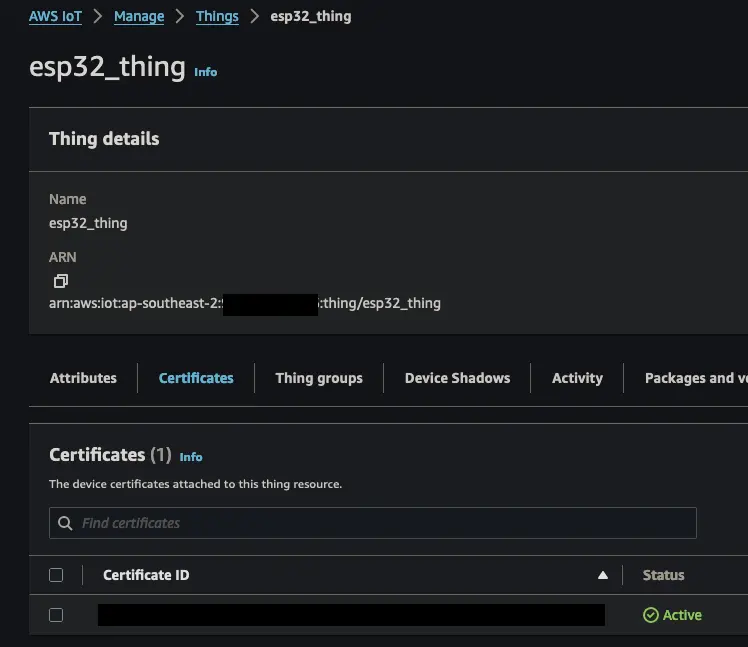
Now if we go back and look at our thing, we can see the certificate (and therefore policy) is attached.
Putting it all together
We have a thing, a certificate, a policy and our endpoint so we can update our secrets.h file from Part1 and upload our sketch.
Terraform:
Why Terraform? Well for one using the console is boring and another is having the ability to deploy resources in a standardised and repeatable way using Infrastructure as Code (IaC).
Note: This won’t be a deep dive into how to use terraform, there is plenty of those out there already. Maybe I will do one at some stage but for now there is an assumed level of knowledge with this next part
Variables
Variables are used for several reasons:
- Allows you to write reusable code. You can use the same Terraform configuration with different input values to create different resources.
- Makes your configuration easier to read and maintain. Instead of hardcoding values, you can use descriptive variable names.
- Allows you to provide sensitive data, like passwords or API keys, without hardcoding them into your configuration. You can provide these values through a “secure” channel, like environment variables or a secure file.
1
2
3
4
5
6
7
8
9
10
11
12
13
14
15
16
17
18
19
20
21
22
23
24
25
26
27
28
29
30
31
32
33
34
35
36
37
variable "account_id" {
  description = "The account ID."
  type        = string
  default     = null
  validation {
    condition     = can(regex("^\\d{12}$", var.account_id))
    error_message = "Must be a valid AWS account ID."
  }
}

variable "region" {
  description = "The region."
  type        = string
  default     = "ap-southeast-2"
}

variable "iot_topic_pub" {
  description = "The IoT topic to publish to."
  type        = string
  default     = "esp32/pub"
}

variable "iot_topic_sub" {
  description = "The IoT topic to subscribe to."
  type        = string
  default     = "esp32/sub"
}

variable "wifi_ssid" {
  description = "The WiFi SSID."
  type        = string
}

variable "wifi_password" {
  description = "The WiFi password."
  type        = string
}
Certificate
1
2
3
4
resource "aws_iot_certificate" "cert" {
  active = true
}
Thing
1
2
3
4
5
6
7
8
resource "aws_iot_thing" "this" {
  name = "esp32_thing"
}

resource "aws_iot_thing_principal_attachment" "this" {
  principal = aws_iot_certificate.cert.arn
  thing     = aws_iot_thing.this.name
}
Policy
1
2
3
4
5
6
7
8
9
10
11
12
13
14
15
16
17
18
19
20
21
22
23
24
25
26
27
28
29
30
31
32
33
34
35
36
37
38
39
40
41
42
43
44
45
46
47
48
49
50
51
resource "aws_iot_policy" "this" {
  name = "esp32_policy"

  policy = data.aws_iam_policy_document.this.json
}

data "aws_iam_policy_document" "this" {
  statement {
    actions = [
      "iot:Connect",
    ]
    effect = "Allow"
    resources = [
      "arn:aws:iot:${var.region}:${var.account_id}:client/${aws_iot_thing.this.name}",
    ]
  }
  statement {
    actions = [
      "iot:Publish",
    ]
    effect = "Allow"
    resources = [
      "arn:aws:iot:${var.region}:${var.account_id}:topic/${var.iot_topic_pub}"
   ]
  }
  statement {
    actions = [
      "iot:Receive",
    ]
    effect = "Allow"
    resources = [
      "arn:aws:iot:${var.region}:${var.account_id}:topic/${var.iot_topic_sub}"
    ]
  }
  statement {
    actions = [
      "iot:Subscribe",
    ]
    effect = "Allow"
    resources = [
      "arn:aws:iot:${var.region}:${var.account_id}:topicfilter/${var.iot_topic_sub}"
    ]
  }
}
resource "aws_iot_policy_attachment" "this" {
  policy = aws_iot_policy.this.name
  target = aws_iot_certificate.cert.arn
}
resource "aws_iot_certificate" "cert" {
  active = true
}
Endpoint
1
2
3
data "aws_iot_endpoint" "this" {
  endpoint_type = "iot:Data-ATS"
}
I decided to use the Terraform templatefile function to generate the sketch files for this project. This is so I could use the same variables that I had already defined in terraform, in the Arduino sketch also .
1
2
3
4
5
6
7
8
9
10
11
12
13
14
15
16
17
18
19
20
21
22
23
24
locals {
  rendered_template_secrets = templatefile("${path.root}/arduino/templates/secrets.h.tpl", {
    thingname        = aws_iot_thing.this.name
    wifi_ssid        = var.wifi_ssid
    wifi_password    = var.wifi_password
    aws_iot_endpoint = data.aws_iot_endpoint.this.endpoint_address
    device_cert      = aws_iot_certificate.cert.certificate_pem
    private_key      = aws_iot_certificate.cert.private_key
  })
  rendered_template_ino = templatefile("${path.root}/arduino/templates/basic-pubsub.ino.tpl", {
    iot_topic_pub = var.iot_topic_pub
    iot_topic_sub = var.iot_topic_sub
  })
}

resource "local_file" "secrets" {
  filename = "${path.root}/arduino/basic-pubsub.ino/basic-pubsub/secrets.h"
  content  = local.rendered_template_secrets
}

resource "local_file" "ino" {
  filename = "${path.root}/arduino/basic-pubsub.ino/basic-pubsub/basic-pubsub.ino"
  content  = local.rendered_template_ino
}
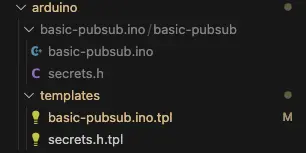
Result
The secrets.h and basic-pubsub.ino files have now been generated in the correct directory structure ready to be uploaded with the Arduino IDE (setup in Part1)
Links
https://blog.mander.nz/posts/aws-iot-part1
Image generated using AWS Bedrock