Getting Started | AWS IoT - Part 1
Having used IoT devices (ESP8266, ESP32, RaspiberryPi) for many years in my “Smart Home”, always wanting local control over the devices I bought, I recently decided to look over the other side of the fence at what AWS offer…. enter AWS IoT.
This is a multi-part blog series so be sure to checkout Part 2. I will focus on the Arduino IDE setup and sketch configuration in this part…
Prerequisites:
Some prerequisites are:
- The Arduino IDE. Getting the software will vary based on your operating system and its availiability in your package manager. I will be installing it via Homebrew
brew install --cask arduino-ide - Compatible serials drivers for your device and operating system. As above this will vary, however the vcp-drivers can be also be installed via brew
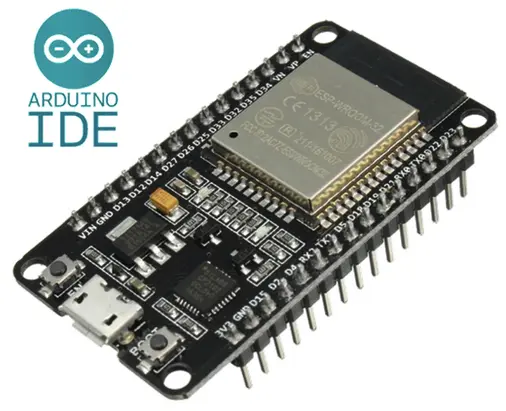
brew install --cask silicon-labs-vcp-driver - A microcontroller such as an ESP32 board, I will be using an ESP32 DEVKITV1
- An AWS Account
- WiFi
Arduino IDE:
First up lets get the Arduino IDE setup, which is an open-source development environment for programming microcontrollers. We will install board definitions and libraries to enable communications with the ESP32 board itself as well as the software packages we will need in our code later such as MQTT.
- Start the IDE and open up settings/preferences (depending on OS)
- For Additional boards manager URLs, add:
https://dl.espressif.com/dl/package_esp32_index.json

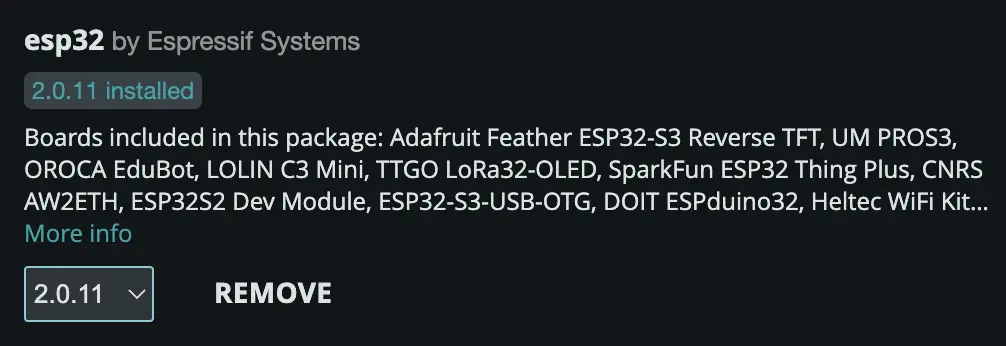
- Choose Tools –> Board –> Board Manager
- Search
esp32and install the latest byEspressif Systems
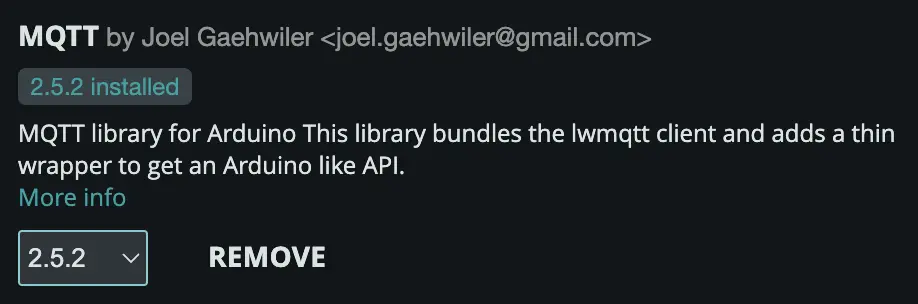
- Choose Sketch –> Include Library –> Manage Libraries
- Search
mqttand install the latest byJoel Gaehwiler
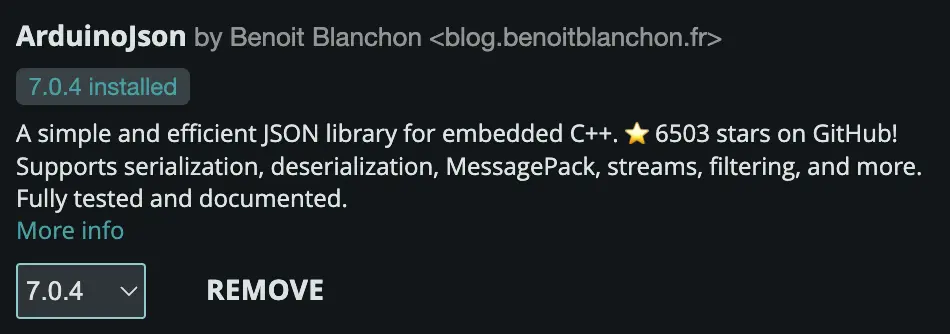
- Repeat step 7 but for
ArduinoJsonbyBeniot Blanchon

Now your Arduino IDE should be all setup…. time to create some code.
Code Time:
I will base this next section on this Github repo.
What is a sketch file you ask?
In Arduino programming, an .ino file is what’s known as a sketch file. This is the main file where you write your code for your Arduino projects. The file is written in a language that is a mixture of C and C++. The .ino file is where you’ll define two main functions: setup() and loop().
The setup() function is used to initialize variables, input and output pin modes, and start using libraries. The setup() function will only run once, after each power-up or reset of the Arduino board.
After setup() runs, the loop() function runs indefinitely, and is where the main logic of your code will typically reside. This could be reading sensor data, turning on or off LEDs, sending data to a computer, and more.
The .ino file is named after the project (or sketch) name and is saved in a folder of the same name. For example, if your project is named “basic-pubsub”, the main sketch file would be basic-pubsub.ino. This file is what you’ll open with the Arduino IDE when you’re ready to write or modify your code.
1
2
3
4
arduino
└──  basic-pubsub
   ├── basic-pubsub.ino
   └── secrets.h
Secrets:
First we need to define our secrets in a secrets.h. This file is where we store our “thingname” as well as the WiFi credentials, AWS IoT endpoint and certificate information used to connect and authenticate with AWS IoT.
secrets.h
1
2
3
4
5
6
7
8
9
10
11
12
13
14
15
16
17
18
19
20
21
22
23
#define THINGNAME "thing32"

const char WIFI_SSID[] = "ConnectToMe";
const char WIFI_PASSWORD[] = "betyoucantguessmypassword%";
const char AWS_IOT_ENDPOINT[] = "xxxxx.amazonaws.com";

// Amazon Root CA 1
static const char AWS_CERT_CA[] PROGMEM = R"EOF(
-----BEGIN CERTIFICATE-----
-----END CERTIFICATE-----
)EOF";

// Device Certificate
static const char AWS_CERT_CRT[] PROGMEM = R"KEY(
-----BEGIN CERTIFICATE-----
-----END CERTIFICATE-----
)KEY";

// Device Private Key
static const char AWS_CERT_PRIVATE[] PROGMEM = R"KEY(
-----BEGIN RSA PRIVATE KEY-----
-----END RSA PRIVATE KEY-----
)KEY";
The Amazon Root CA can be found here. You will need to get the device certificate and private key when you are creating a “thing” in AWS IoT
Main Sketch:
basic-pubsub.ino
1
2
3
4
5
6
7
8
9
10
11
12
13
14
15
16
17
18
19
20
21
22
23
24
25
26
27
28
29
30
31
32
33
34
35
36
37
38
39
40
41
42
43
44
45
46
47
48
49
50
51
52
53
54
55
56
57
58
59
60
61
62
63
64
65
66
67
68
69
70
71
72
73
74
75
76
77
78
79
80
81
82
83
84
85
86
87
88
89
90
91
92
93
94
95
96
97
98
99
100
101
102
103
104
105
106
#include "secrets.h"
#include <time.h>
#include <WiFiClientSecure.h>
#include <MQTTClient.h>
#include <ArduinoJson.h>
#include "WiFi.h"

// The MQTT topics that this device should publish/subscribe
#define AWS_IOT_PUBLISH_TOPIC   "esp32/pub"
#define AWS_IOT_SUBSCRIBE_TOPIC "esp32/sub"
float TEMPERATURE = 0.0;

WiFiClientSecure net = WiFiClientSecure();
MQTTClient client = MQTTClient(256);

void connectAWS()
{
  WiFi.mode(WIFI_STA);
  WiFi.begin(WIFI_SSID, WIFI_PASSWORD);

  Serial.println("Connecting to Wi-Fi");

  while (WiFi.status() != WL_CONNECTED){
    delay(500);
    Serial.print(".");
  }

  Serial.println(WiFi.localIP());
  // Configure WiFiClientSecure to use the AWS IoT device credentials
  net.setCACert(AWS_CERT_CA);
  net.setCertificate(AWS_CERT_CRT);
  net.setPrivateKey(AWS_CERT_PRIVATE);

  // Connect to the MQTT broker on the AWS endpoint we defined earlier
  client.begin(AWS_IOT_ENDPOINT, 8883, net);

  // Create a message handler
  client.onMessage(messageHandler);

  Serial.print("Connecting to AWS IOT");

  while (!client.connect(THINGNAME)) {
    Serial.print(".");
    delay(100);
  }

  if(!client.connected()){
    Serial.println("AWS IoT Timeout!");
    return;
  }

  // Subscribe to a topic
  client.subscribe(AWS_IOT_SUBSCRIBE_TOPIC);

  Serial.println("AWS IoT Connected!");
}

void publishMessage() {
  StaticJsonDocument<200> doc;
  doc["time"] = millis();
  doc["hostname"] = THINGNAME;
  doc["value"] = random(0, 100);
  doc["temperature"] = TEMPERATURE;
  char jsonBuffer[512];
  serializeJson(doc, jsonBuffer);

  if(client.connected()){
    client.publish(AWS_IOT_PUBLISH_TOPIC, jsonBuffer);
    // Serial.println(jsonBuffer);
  } else {
    Serial.println("Failed to publish message because client is not connected.");
  }
}

void messageHandler(String &topic, String &payload) {
  Serial.println("incoming: " + topic + " - " + payload);

  StaticJsonDocument<200> doc;
  DeserializationError error = deserializeJson(doc, payload);

  // Test if parsing succeeds.
  if (error) {
    Serial.print("deserializeJson() failed: ");
    Serial.println(error.c_str());
    return;
  }

  // Check if "temperature" field exists in the payload
  if(doc.containsKey("temperature")) {
    TEMPERATURE = doc["temperature"];
    Serial.print("Updated temperature: ");
    Serial.println(TEMPERATURE);
  }
}
void setup() {
  Serial.begin(9600);
  Serial.println("Setup started");
  connectAWS();
  Serial.println("Setup complete");
}

void loop() {
  publishMessage();
  client.loop();
  delay(1000);
}
I won’t go over the sketch in detail but in summary….
We need to define a couple of constants/variables that the program will use, such as the MQTT topics publish and subscribe.
The device then connects to the WiFi network before connecting/authenticating to AWS IoT core using the secrets we defined eariler in secrets.h.
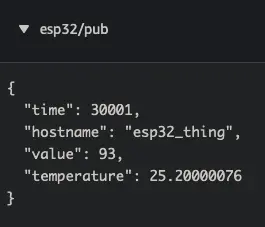
Once connected the current time, thingname, temperature (used later), and a value (randomly generated) will be published to the MQTT topic esp32/pub.
Once this message has been published, the program will pause/delay for 1000 milliseconds before repeating the loop and so on…..
Upload:
Time to upload the sketch to the ESP32 Microcontroller. Choose Sketch –> Upload
The sketch will be verified and compiled before uploaded to the device. Once completed click the “Serial Monitor” tab to see the connection process:

Using the MQTT test client in AWS IoT Core console, we can can subscribe to the topic we chose earlier esp32/pub to see the messages from the ESP32. Note: The MQTT version needs to be swapped to “3” for this example.
Result:
Links
https://aws.amazon.com/blogs/compute/building-an-aws-iot-core-device-using-aws-serverless-and-an-esp32 https://github.com/aws-samples/aws-iot-esp32-arduino-examples
Image from https://www.instructables.com/ESP32-Internal-Details-and-Pinout/